Briefing Room
Statement from President Joe Biden on $6.1 Billion in Student Debt Cancellation for 317,000 Borrowers who Attended the Art Institutes
A Proclamation on National Mental Health Awareness Month, 2024
Statement from President Joe Biden on First Quarter 2024 GDP
A Proclamation on Asian American, Native Hawaiian, and Pacific Islanders Heritage Month, 2024
FACT SHEET: Biden-Harris Administration Continues to Call on Congressional Republicans and Internet Service Providers to Keep Americans Connected as the Affordable Connectivity Program Enters Final Month
Remarks by President Biden at the White House Correspondents’ Dinner
FACT SHEET: Biden-Harris Administration Announces $3 Billion to Replace Toxic Lead Pipes and Deliver Clean Drinking Water to Communities Across the Country
Readout of President Joe Biden’s Call with Prime Minister Netanyahu of Israel
FACT SHEET: President Biden Announces up to $6.1 Billion Preliminary Agreement with Micron under the CHIPS and Science Act
Featured Media
Last year, we secured the release of Abigail, a 4-year-old who was being held by Hamas.

Colin, you did a hell of a job hosting this year's White House Correspondents Dinner.

Since I took office, Americans have filed a record 17 million new business applications – each one of them an act of hope and confidence in our economy.

New Rule Alert: Airlines are now required to promptly provide passengers with automatic cash refunds when owed.

We’re bringing advanced chip manufacturing back to America after 40 years.

This month, we celebrate our diverse AA and NHPI communities and renew our commitment to fulfilling the promise of equality for all.

Kamala and I will continue to call on Congress to restore the protections of Roe v. Wade in federal law.

As President Biden says, every time someone starts a new small business, it’s an act of hope and confidence in our economy. And under his economic agenda, America is in the midst of a historic small business boom.
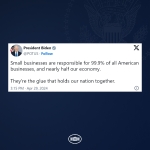
Small businesses are responsible for 99.9% of all American businesses, and nearly half our economy. They're the glue that holds our nation together.
I committed to you that I’m going to conserve at least 30% of America’s land and waters by 2030. Period. And folks, we’re well on our way.
Investing in the
American
People
From rebuilding our infrastructure to lowering costs for families, President Biden’s economic agenda is investing in America.


We Want to Hear From You
Send a text message to President Biden, or contact the White House.
Message and data rates may apply.
Reply HELP for help or STOP to cancel.